This tutorial was originally published on the now defunct site 3dtutorialzone.com and probably written by Travis
I slightly updated it for Maya 2016/17.
Tools used in this tutorial
 Revolve (Curves/Surfaces)
Tutorial 3: Using Revolve
Revolve takes a nurbs curve, spins it kind of like pottery, and makes a complete 360 degree object.
Set-up
Set the menu set to surfaces.
Make sure you're familiar with basic nurbs curves and basic polygons.
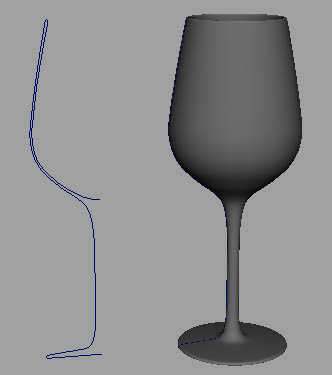
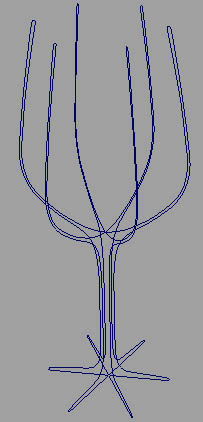
Creating The Profile Curve
This is the profile of whatever object you're making. In this tutorial we're making a glass.
Profile curves are made with nurb curves.
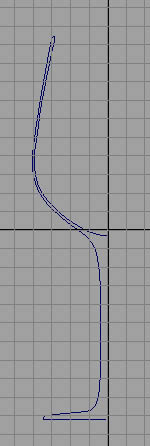
Step one - Go to Create > Curve Tools > CV Curve Tool
Step two - Create the profile of the glass on one side.
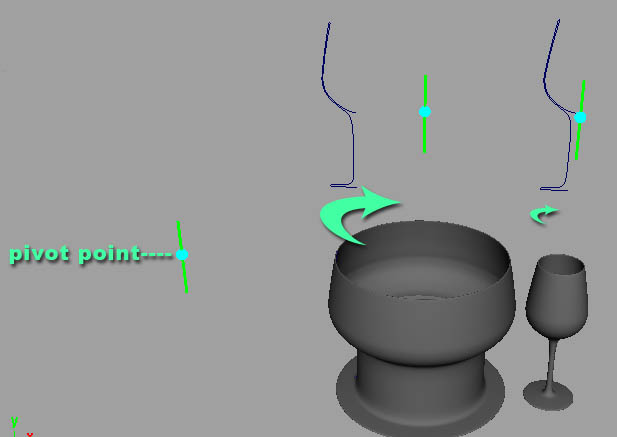
Step three - By default the pivot point will be set to the center of the scene. Since the pivot point is the point at which the revolve function will revolve the surface around, it's important that it sits in the right place. In this case, it is in the center of the scene (origin).
insert button on a Mac
- Hold down
din stead.
Step four - Select the curve and go to surfaces>revolve... Open the options.
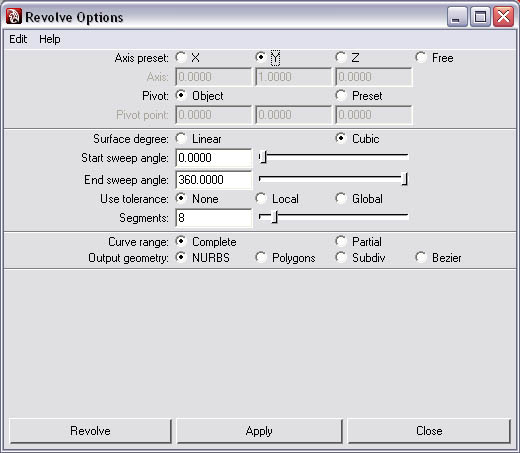
There are a lot of different combinations that can be set up using this function. I will cover the most commonly used attributes.
- Dictionary definition of tesselation: Mosaic -or- a covering of an infinite geometric plane without gaps or overlaps by congruent plane figures of one type or a few types
Axis preset - You can revolve around the X, Y, or
Z axis. For our glass, we're going to revolve around the Y axis (up).
Look at the image below that demonstrates the other axises.
If you set it to free, you can set a custom axis.
Pivot - You have two options: object or preset. If
you set it to object it will use the object's pivot point to revolve
around. Set it to preset and the object will revolve around the
location you specified in the three fields below.
Surface degree - You have two options: linear or
cubic. These attributes work closely with the segments attributes. Use
the image below to help explain.
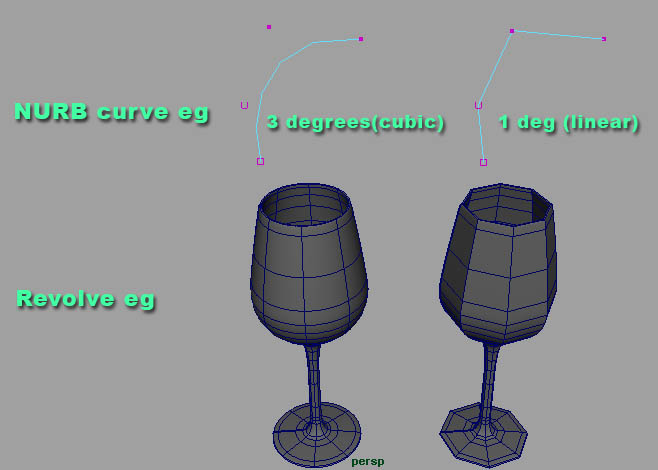
Segments - This is how many profiles will be created around the revolve. Each profile curve is referred to as an isoparms.
Output geometry - You can output as nurbs, polygons, subdiv or beizer. Set it to polygons and it will display the rest of the options.
Output geometry - polygons - Here are the best set-ups for generating polygons from a revolve.
Note - There are other options but they don't provide admirable results.
No. 1
Set the type to quad and the tessellation method to count. Set the count to the amount of polygons you'll be needing. Add more if the object appears jagged after the revolve.

No. 2
Set the type to quad and the tessellation method to general.
Initial Tessellation Controls
U and V type - The best tool options are "per surf # of iso params" and
"per span # iso of params". If you set it to the first one, the number
of U or V segments will be set over the entire surface. Set to the
second one, the U or V segments will be determined between two isoparms.
The secondary tessellation controls I find don't help in the geometry output.
No. 3
Set the type to quad and the tessellation method to control points. This will set the polygons vertices to the control vertex on the isoparms. For this to look good, increase the segments and control vertexes of the curve, in other words, create nore CVs when using the CV curve tool.