Unfolding UVs
In Maya 2015, Autodesk introduced a new method to unfold UVs called 3DUnfold. Here is a video showing how you can use that to quickly layout UVs
Below is an older tutorial I created. The last part (resizing the face) is still valid.
Unfolding UVs - Legacy method
If you ever despaired while trying to correct UVs resulting from a projection thatleaves you with a lot of polygons overlapping in texture space, here is another unfolding technique. It is based on / inspired by this video on YouTube
For this technique to work (for the Maya unfold feature to do its work properly) your model should not have holes. Make sure the eye sockets and the mouth are closed off properly.
The most important thing is to choose your seam wisely. The head used in this tutorial is should have the seam in the back (Since it is open at the bottom it does not technically need a seam, but without the results are not very useful)
To start things off you want to project UVs from the side: Polygons → Creat UVs → Planar Mapping.
Use Edge selection in 3D view to select all the center edges.
Go to the UV texture editor, and convert the selction to UVs (Select → Convert Selection to UVs)
Swicth to UV selection mode, and deselect the UVs in the back, where the seam will be. You should have someting like this:
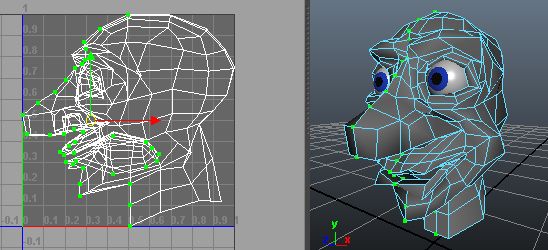
Move the selected UVs out, so they are clearly separated from the other UVs:
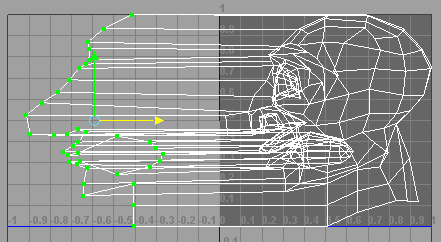
Straighten those UVs into a vertical line. Try to keep the distance between adjacent UVs similar to what is was as a result of the projection. In the inside of the mouth you want to put them much closer together as to not waste valuable UV space there:
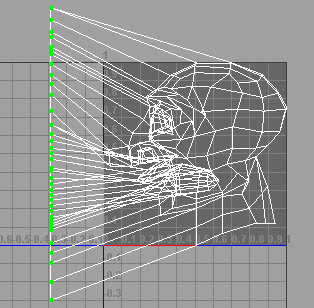
Select the UVs on the back where the seam will be:
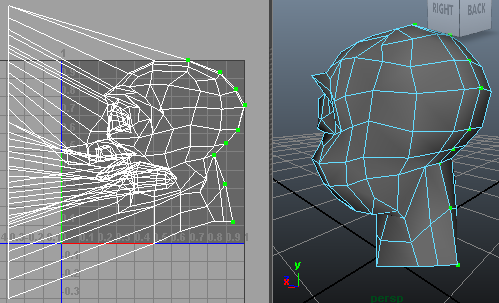
Separate those UVs (hit the icon shown below):

To make Maya work its magic, you need to again select the UVs on the vertical line you created (see the image above the one where the seam is selected)
In the UV texture editor select the options for Polygons → Unfold. You can use the default settings (Edit → Reset Settings) except for one thing: change the Pinning to Pin Uvs → Pin Selected UVs. Hit Apply (or Apply and Close), en there you have it:
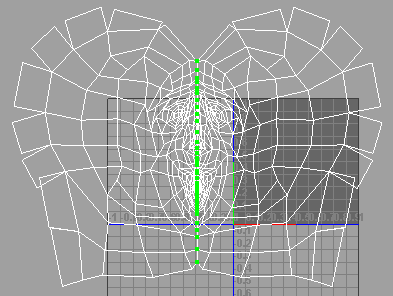
The result when choosing not to use a seam can be seen here.
The edges of this UV layout seem to be all torn. But we can fix that. Select all the UV's one removed from the seam. A simple way to do this in 3D view is to select the vertices on the seam, grow the seletion once and then deselect the vertices on the seam.:
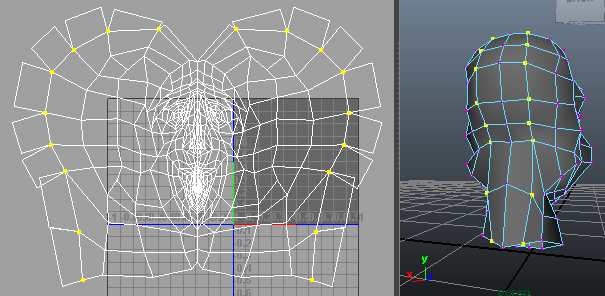
If you selected vertices as in the image above, you do then need to convert this selection to UVs
To repair the "torn edges" go to Polygons → Move and Sew UV Edges (again in the UV texture editor):
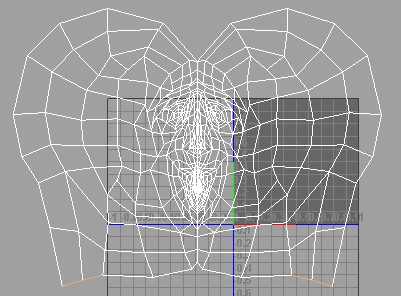
You now have flattened out the model in 2D texture space. A first step towards a better UV distribution in to select all UVs and use Polygons → Relax:
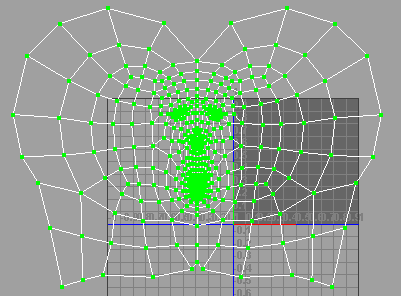
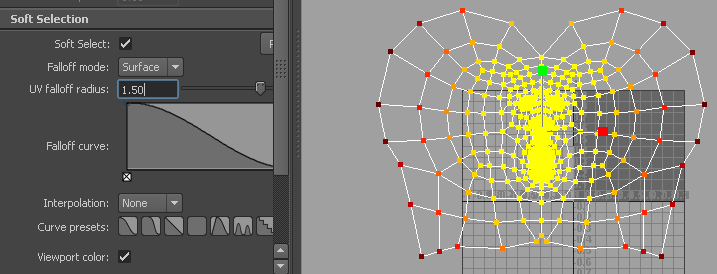
The face is taking up relatively little space. By soft selecting the face, you can scale this up. Make sure not to scale too far: polygons should not start overlapping again!
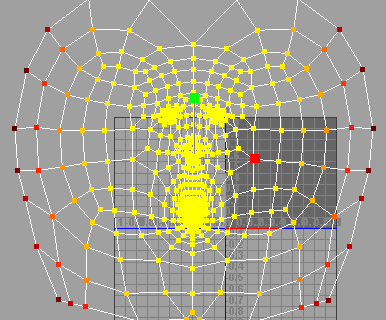
Finally, you need to normalize the UVs to fit them into the 0-1 UV space. Select all UVs and go to Polygons → Normalize:
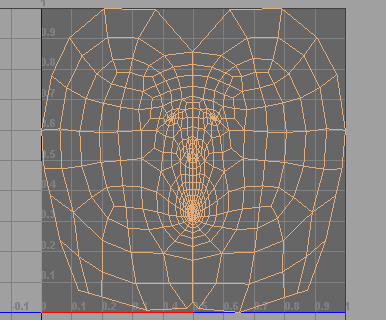
Now export this by creating a UV snapshot and create the prefect texture map using your favorite image editing tool.