Matte "Painting"
Creating background images in Photoshop and how to use them in Maya.
Photoshop: Using layer masks
You can create layers with transparency in Photoshop in two ways- Erasing part of the image
- Masking off parts of the image
The advantage of using layer masks is that they are non-destructive: what you want to hide you paint black in the layer mask, what you want to reveal white. Want to bring something back you painted away? Simply bring it back by painting white.
Creating a layer mask
The easiest way to create a layer mask is to select the part of the image you want to keep, and hit the add layer mask button. Note: you cannot create a mask for a background layer. You can turn a background layer into a normal layer by double clicking on it in the layer window.

Make sure that when you want to paint on your layer mask, you click on it first in the layers window. Just selecting the layer will make you paint in the image itself.
Here is a tutorial: http://www.lunacore.com/photoshop/tutorials/tut003.htm
All you need to know: Adobe help on Layers
You can also look at a small version of the photoshop file I used in class.
Preparing the image for Maya
Unfortunately Maya cannot work with transparency from photoshop and prefers premultiplied alpha: coverage channels that have already been applied to the color information resulting in the image being black where the mask has no coverage (is also black)
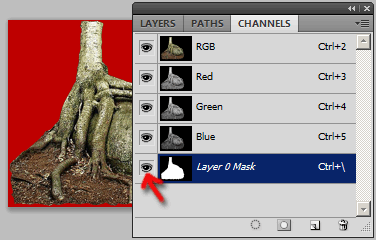
You can make your layer mask visible as a red overlay by clicking on the eye icon for it in that channels window. Make sure to switch to the channels window with the layer that contains your layer mask selected.
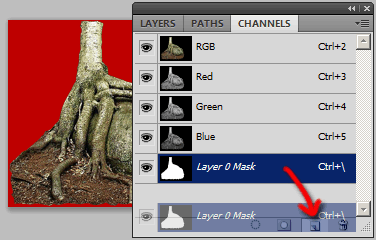
Duplicate that channel by dragging it on to the new layer icon at the bottom of the channel window.
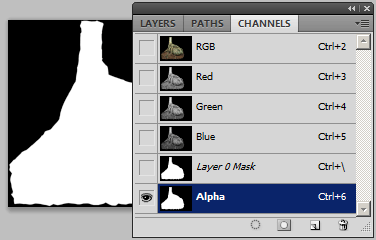
Rename the new layer "Alpha".
Simply double clicking on the layer name will enable you to do so.
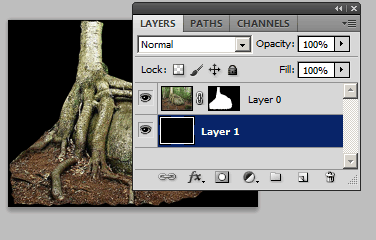
Switch back to the layer window and create a new layer. Drag it underneath the existing layer and make it black (bucket fill or select all and fill)
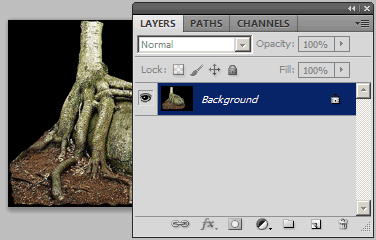
Flatten the image. This will delete the layer mask but the channel you renamed "Alpha" will be preserved.
Save it as a Targa file (with alpha channel)
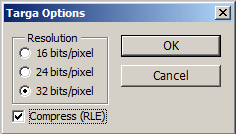
Using (lossless) RLE compression is optional: the file will be smaller but load (marginally) slower during rendering.
Putting the image in Maya
To get the image, which you of course saved in the sourceimages directory of your project, to show up as a transparent background plane in Maya, you need to create an object to put it on.
Create a polygonal Plane in Maya and place it behind your scene. Make sure it has the same aspect ratio as the image you will put on there. If your image is 1536*512px, the aspect ratio is 1536:512 = (3*512):512 = 3:1 and you background place could be 300 x 100 units.
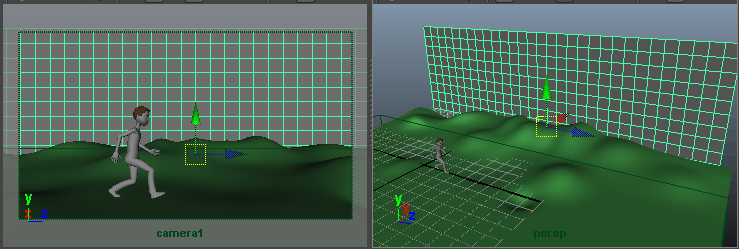
From the camera view the plane should cover the entire image area above your foreground plane. Make sure the aspect ratio of your camera matches your render size: if you render at 720p, the image will be 1280*720px which means the aspect ratio is 16:9 or 1.78:1 [cameraShape properties > Film Back > Film Aspect Ratio].
 Show the film gate to know where the edge of the image is.
I moved the pivot down to floor level as it makes scaling of the copies of this plane I will place behind it easier.
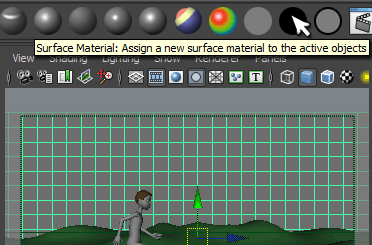
Select the plane and assign it a surface shader (the black shader ball from the Rendering Shelf)
The surface shader does not include any lighting calculations and is therefor the fastest way to make the image show up in the render.
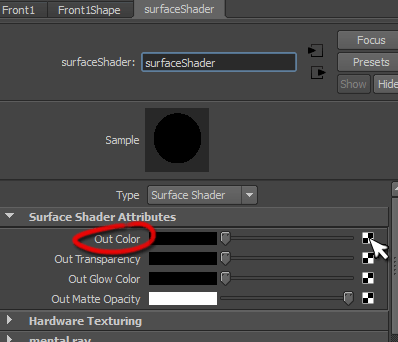
Through the property editor, connect a file node to the Surface Shader Attributes >Out Color field of the surfaceShader you just created. Load the first background image.

Switch your view to the preset that includes the Hypershade panel
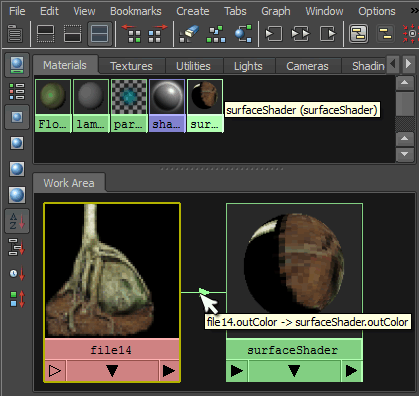
In Hypershade, right click on the surfaceShader (found under Materials) and choose Graph Network.
Double click on the arrow connecting the file node to the surface shader. This will open up the connection editor.
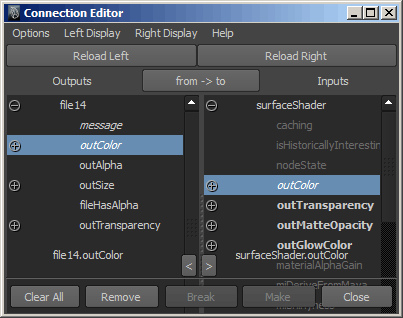
In the connection editor you can see that the outColor is connected to the outColor (select the outColor in the Left column)
You can simplify the view of the lists in the connection editor: choose Left Display > Show Outputs Only and Right Display > Show Inputs only (the latter seems to be set by default)
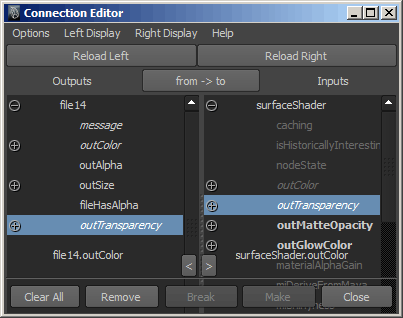
Connect the outTransparency to outTransparency by fist selecting it on the left (file node outputs) and then on the right (surface shader inputs)
Transparency is the inverse of the Alpha channel: 1 where the alpha channel is black for no coverage / full transparency and 0 (zero) where the coverage is full (no transparency)
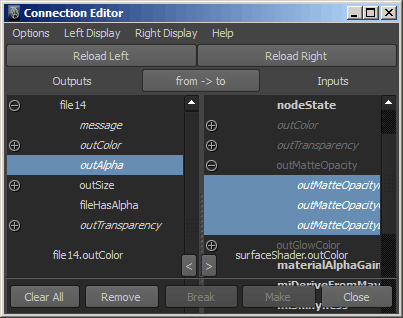
To complete the process (the shader does work without this step) you want to connect the outAlpha to outMatteOpacity. This will ensure that the alpha channel of the render is correct.
The Alpha channel contains only a single value and can not be directly connected to outMatteOpacity, which expects a color (three values: r, g and b) so you need to click on the plus in front of outMatteOpacity and connect it to all three values.
Note: not only is the outTransparency the inverse of the Alpha channel, it has that value copied to all three color channels (it is a color value, not a single scalar)
If you now look at the camera and perspective views, and turn on textured mode you see the plane has the image on it and is transparent (the front layer of the supplied Photoshop file is used here)

If the image does not fit properly, select the plane object, go to the texture editor and normalize the UV's by selecting all UV's and going to Polygons > Normalize.
Placing the next background plane
To create the next layer of background, you simply duplicate the one just created, move it back and scale it up so it again fist the camera view. You do need to assign it its own surface shader.

You can place any number of these planes with image textures and even bulge them where the image calls for it for an added depth illusion.
Here is the rendered version of both setups: